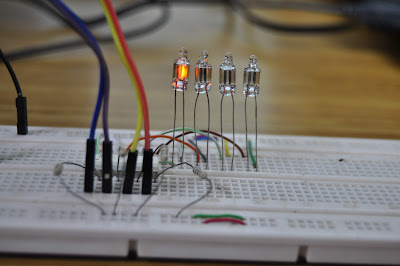
Most of design of nixie clock is based on nixie driver (IC 74141). However, it is difficult to purchase this IC chip, at least in my country. So i decided to design a circuit control neon lamp (next is nixie tube) without using nixie driver, but only using opto isolation chip
My first experiment will make neon lamp player at 150VDC
Watch the video to see full instruction:
Step 1: Part List
Part list i'm using for the project:1. Neon lamp, dot type https://amzn.to/35SQrsy
2. Opto isolation chip TLP627-4
3. Arduino UNO https://amzn.to/2P58O7s
4. DC step-up module (up to 390VDC!) https://amzn.to/30kpdK9
The isolation chip TLP627-4 can isolate up to 300VDC!
DC step-up module can convert from 8-32VDC to 45-390VDC! Please careful when working with high voltage!
Step 2: Circuit Design
The circuit is quite simple for most of us. Just output from Arduino to control opto coupler, then the coupler control neon lamp with DC step-up module
I add one diode to make sure no mistake by connection.
Step 3: Build the Circuit With Breadboard
Someone will think 150VDC connected to breadboard is too dangerous. However, neon lamp consumes only 0.5mA. I've already taken risk to try it, fortunately, it works! haha
Conclusion
Finally, i got successful with neon player at 150VDC. This experiment will help me in next step to make Nixie clock by Arduino and opto isolation chip only. I hope it can run, please wait for my next project
Thank you.


0 Comments: