Connect the board with the computer.
After receiving the board from manufacturer, it has already Linux OS on target board. However, we should know how to install it for the case the OS is ruin. I used laptop that installed WindowXP to connect with the mini2440 board.Step1: Connect comport from mini2440 board to laptop.
Because the laptop does not have comport, we use com-usb adapter. So we should install driver for com-usb adpter. My adapter has a form like this, and its driver is here http://www.mediafire.com/?1r4461tbig0445r
After installed driver and pluged it into laptop, it should show the information about com-usb adapter in Device Manager as in above picture.
Step2: connect usb port from mini2440 to computer (using a white usb cord).
Step3: connect power and switch S2 into NOR side. Switch power on.
Install the tool on WindowXP
After switched power on, the WindowXP will ask for driver usb, go to the directory of CD (that is shipped with the board) Windows_platform_tool\usb_download_driver, click on FriendlyARM USB Download Driver Setup_20090421.exe to install driver for usb connection.Go to Windows_platform_tool\dnw (on CD), click on dnw.exe, the dnw tool will open. If the usb connection is right, it should show [USB:OK] as in follow picture.
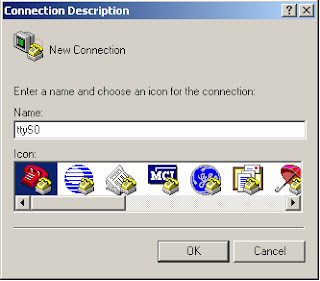
Next, click on Start> Programs> Accessories> Communications> Hyper Terminal, then follow this:

After those steps, now you press reset button on mini2440 board, it should show the menu like this on super terminal
If you have done, you should save this hyper terminal for next time using.
Okay, everything is ready for installing Linux into mini2440.
Install Linux on mini2440 board
The steps install: Format NAND Flash -> install boot loader vboot -> install Linux kernel -> install root file system. Done.Step 1: Format NAND Flash
On Hyper Terminal, press 'x' key, then 'f' key.
Step 2: Install boot loader
On Hyper Terminal, press 'v' key.
Then on DNW tool, choose USB Port> Transmit/Restore, choose vboot.bin on directory of images\linux on CD.(This transmitting file is very fast)
On Hyper Terminal, press 'k' key.
Then on DNW tool, choose USB Port> Transmit/Restore, choose zImage_T35 on directory of images\linux on CD.(This transmitting file takes about 5 seconds)
Step 4: Install root file system
On Hyper Terminal, press 'y' key.
Then on DNW tool, choose USB Port> Transmit/Restore, choose root_qtopia-128M.img on directory of images\linux on CD.(This transmitting file takes about 1 minute).
----------------------------------------------------------------------------------------------
Okay, now you go to Hyper Terminal and press 'b' to start linux on mini2440 board. If every thing is right, it should be started as you saw.
After booting by Hyper Terminal, you can switch S2 into NAND side and press reset button to start Linux again.


hello
ReplyDeletehow do i download file linus ?
can you share me ? please
Hi, linux file is here: https://drive.google.com/file/d/12BTpIF87yA8h8dyWreEv9SprCOR6DvcA/view?usp=sharing
Delete